Thursday, November 4

Add Signature to your Blog


Do you want to show your customized signature below your blogger posts? All your blog posts will carry your signature at the bottom area of your posts. You can add your signature in both text and image format, but since image format gives you a lots of options like custom text, custom formatting etc, I will guide you with adding a custom signature in image format. Follow the below steps carefully and you will be able to add your personalized custom signature to your blog posts on blogger/blogspot platform.
First of all we have to make a custom signature. There are a lots of custom signature generating sites available on net. One of the best custom signature sites is MytLiveSignature. Go to My live Signature and make one customized signature for you. Once you are done with your signature, get the link to your signature. You can also download your signature, upload to any image hosting site and get the link from there.
I assume you are done with your signature and ready with a link to it, now follow the below steps.
  • Log on to your blogger Dashboard.
  • Navigate to Layout >> Edit HTML
  • Expand your widgets by clicking on Expand Widget Templates
  • Search for the following code inside your HTML code
<P><data:post.body/></P>


  • Now add the following code just after the above code.

<img src=”LINK TO SIGNATURE” />

  • Final code should like this :
<P><data:post.body/></P>
<img src=”LINK TO SIGNAT


URE” />

  • Click on Save to save the changes.

  • You are done.
Now you should see the image signature below your blogger blog posts. If you want to write your signature in text, simply replace the signature link with your name and you will be done.
source : www.solidblogger.com


Web Colors


Web colors are colors used in designing web pages, and the methods for describing and specifying those colors. Hexadecimal color codes begin with a hash (#).
Authors of web pages have a variety of options available for specifying colors for elements of web documents. Colors may be specified as an RGB triplet in hexadecimalformat (a hex triplet); they may also be specified according to their common English names in some cases. Often a color tool or other graphics software is used to generate color values.
The first versions of Mosaic and Netscape Navigator used the X11 color names as the basis for their color lists, as both started as X Window System applications.
Web colors have an unambiguous colorimetric definition, sRGB, which relates the chromaticities of a particular phosphor set, a given transfer curve, adaptive whitepoint, and viewing conditions.
These have been chosen to be similar to many real-world monitors and viewing conditions, so that even without color management rendering is fairly close to the specified values. However, user agents vary in the fidelity with which they represent the specified colors. More advanced user agents use color management to provide better color fidelity; this is particularly important for Web-to-print applications.

HTML Color Names

These 16 were labelled as sRGB and included in the HTML 3.0 specification, which noted they were "the standard 16 colors supported with the Windows VGA palette.

X11 Color Names

In addition, a number of colors are defined by web browsers. A particular browser may not recognize all of these colors, but as of 2005 all modern general-use browsers support the full list. Many of these colors are from the list of X11 color names distributed with the X Window System. These colors were standardized by SVG 1.0, and are accepted by SVG Full user agents. They are not part of SVG Tiny.
The list of colors actually shipped with the X11 product varies between implementations, and clashes with certain of the HTML names such as green. Furthermore, X11 colors are defined as simple RGB (hence, no particular color space), rather than sRGB. This means that the list of colors found in X11 (e.g. in /usr/lib/X11/rgb.txt) should not directly be used to choose colors for the web.
The list of web "X11 colors" from the CSS3 specification, along with their hexadecimal and decimal equivalents, is shown below, compare the alphabetical lists in the W3C standards. Note that this includes the common synonyms: aqua (HTML4/CSS 1.0 standard name) and cyan (common sRGB name), magenta (common sRGB name) and fuchsia (HTML4/CSS 1.0 standard name), gray (HTML4/CSS 1.0 standard name) and grey.


Wednesday, November 3

How to Remove Blogger Navbar


Blogger displays a navbar in all it’s blog’s header area. This blogger navbar has been implemented for easier blog navigation but however, it does not look good especially if you are blogging professionally. Generally it shows a search box to search blogger blogs, option to flag blog, follow the blog updates, share option along with a link to view next blogger blog. On the right hand side of the navbar, you get two links where you can either navigate to your Blogger dashboard or sign out of your account.
It takes only a couple of seconds to modify your blog template and hide Blogger navbar. Here we will add a piece of code which will block the navbar from appearing on your blog header.


Removing Blogger Navbar
  • Login to your Blogger dashboard
  • Navigate to Layout >> Edit HTML
  • Search for </head> tag inside your template
  • Add the following code just below the </head> tag
#navbar-iframe {
display: none !important;
}
  • Save the template to save the changes
  • You are done.
Now your blog should not display the navbar on your blog header area. You can always remove the above code from your blog template to bring back the navbar.

source : www.solidblogger.com

How to Add Alexa Widget to Blog


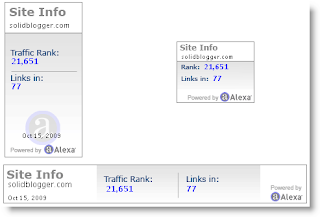
Having an Alexa widget on the blog might influence the Alexa ranking – this has been the belief of many bloggers. I don’t want to argue on this point since this is still a debatable topic and the basic aim of this post is to show how to add Alexa widget to a Blogger blog. Alexa, a website that assigns traffic rank to websites based on the daily traffic, pageviews with other factors has got a handful of widgets that displays the blog rank. Alexa widget sends the accurate traffic data to Alexa on every page load since every time the page is loaded, Alexa script is called and Alexa stores the information to calculate the blog rank.


Adding Alexa Widget to Blogger Blog

  • . Navigate to Alexa widgets page by clicking here
  • ( http://www.alexa.com/siteowners/widgets )
  • . Select the widget that you want to display on your site
  • . Fill up the details and click on Build Widget
  • . Copy the widget code from the next page
  • . Login to Blogger dashboard and navigate to Layout >> Page Elements
  • . Click on Add Widget >> HTML/JavsScript and paste the code
  • . Click on Save to save the changes you have made so far
  • . You are done.
  • Now your blog should display the Alexa widget on Blogger sidebar. Generally this Blogger widgetdisplays the Alexa rank of a blog with the number of incoming links.
source : www.solidblogger.com

How to Create Header in your Blog


All blogger templates come with a specific default header. But it’s not necessary to stick with that default header, we can go ahead, create our own header and use that in our blogger blogs. For this, you have to use your favourite image editing tools like MS paint, Adobe Photoshop etc. Measure the width of your blog and create any attractive header according to that. You can play with the height of the header as you want. Once you are done with your header, it’s time to implement that on our blogger blog.


· Log in to your blogger blog.
· Go to Layout >> Edit HTML
· Make a back up of your blog by clicking on Download Full Template.
· Now search for the following code in your HTML Template
<div id='header-wrapper'>
<b:section class='header' id='header' maxwidgets='1'
showaddelement='no'>
<b:widget id='Header1' locked='true' title='Header
(Header)'
type='Header'/>
</b:section> </div>


· Look at the above code. Few parts are written in bold letters. You have to change them in order to allow custom header to be used. Change 1 to 2, change no to yes and change true to false.
· Save the template and go the Page Elements. Look at the header section of your template, a new Add a Gadget option should be there.


· Here you can customize your template the way you want. If you want a gorgeous picture as your blogger header, but do not want it to link to your blog’s homepage, you can do it by choosing the Picture option and uploading your picture. Now, your blog will show your uploaded picture as your blog’s header but it will link to nowhere.
· If you want to have a header picture and it should link to your blog’s homepage, you can do it by adding some HTML tag. First upload your picture somewhere. You can use imageshack,tinypic, photobucket to host your pictures for free. After uploading your picture get the direct link to that picture. Now click on Add a Gadget >> HTML/JavaScript and add the following code there. Leave the title field blank. Remember to replace YOUR-BLOG-URL with your actual blog address and also replace LINK-TO-YOUR-IAMGE with the actual link to your image and then Save.
<a href="YOUR-BLOG-URL"><img src="LINK-TO-
YOUR-
IAMGE"></a>
· Now we have got a new header on your blog. But your old header is still there. Remove the old header by clicking on Edit >> Remove.
· You are done now with a new blogger custom header.
· In this way you can also have two or more headers on your blogger blogs.


source : www.solidblogger.com


Hide Title & Description From the Header


If you are on blogger platform and using any blogspot default template, you can notice your blog title and description appearing on the header area. If you are using a long blog title and a little more long blog description, then it will look odd. So, you need to remove those blog name and description info from the header area to make it look attractive. You may also like to exclude title & description and create a custom header for your blogger blogs. But remember that having title and description may boost your blog SEO values.


Remove Title & Description From Blogger Header
· Log into your blogger profile and go to Dashboard.
· Navigate to Layout >> Edit HTML.
· Search for #Header h1 in your HTML code. If you don’t find this code, you may search for another piece of code #Header .description.

· Now insert display:none; at the end of the above code.
· Look at the below code to get the idea.
#header .description { /*<-- this is header description css*/
margin:5px 5px 0;
padding:15px 20px .25em;
line-height:1.2em;
display:none; /*<--Insert this line*/ }
· Save the template and you are done.
Now your blog title and description will not show up in your blog’s header area. You may use any attractive image in your header and there will be no text to ruin the beauty of your blogger or blogspot blog header.
you can see my blog as example how i remove the header and the description and replace them with a flash file give a good look to my blog


source : www.solidblogger.com

News